In the intricate world of industrial maintenance and quality assurance, Non-Destructive Testing (NDT) is an essential, multidisciplinary field dedicated to assessing the integrity of materials, components, or assemblies without compromising their functionality. Among the myriad techniques and technologies under the NDT umbrella, the Remote Visual Inspection (RVI) discipline enables cost-effective, quality surface inspections of difficult-to-see components without destroying them. This is made possible through the adoption of advancing imaging technologies and camera sensors integrated within uniquely configured vision system tools.
The continuous evolution of such tools within the RVI discipline — including video borescopes, live weld-monitoring cameras, and pan-tilt-zoom (PTZ) cameras — enhances the critical inspection capabilities that many industry sectors, such as aerospace, tubing manufacturing, and power generation, depend on for their quality assurance measures. As the camera sensors embedded in RVI instruments become increasingly smaller and more sophisticated, they pave the way for more accessible and comprehensive inspections across various industries.
Video Borescopes: Component Quality Inspection in Aerospace
Video borescopes are instrumental tools in the aerospace industry, a sector renowned for its rigorous quality standards for manufactured parts. The video borescope design consists of a robust, flexible, or rigid tube with a micro camera sensor and an illumination source at its tip. This RVI technology enters small openings to inspect complex internal surface geometries within aircraft engine components such as fuel manifold tubing.
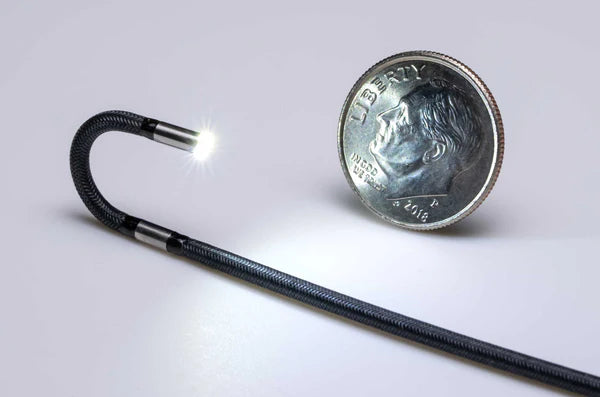
RVI used in the aerospace industry has benefited immensely from video borescope technology innovation. Smaller and higher-resolution charged metal-oxide semiconductor (CMOS) camera sensors, image processing software, such as auto gain and exposure, and articulation innovation enable these tools to carry out RVI more effectively and efficiently.
CMOS sensors continue to become smaller in size and higher in resolution. In 2024, a CMOS chip with dimensions of 0.65 mm x 0.65 mm achieves a 400 x 400-pixel image resolution and can be built into a video probe of 1.1 mm outer diameter with full-range articulation. Prior to this achievement, probes this size used fragile fiber optics that could achieve roughly a 10,000 total pixel count, compared to the 160,000 digital pixels of a 400 x 400 CMOS sensor. Furthermore, articulation in these legacy models did not exist, but the latest 1.1 mm diameter video borescopes have a 360-degree articulation range:
Another recently released 1.1 mm x 1.1 mm CMOS sensor achieves 720 x 720 (518,400 total) pixel image resolution inside a 2.2 mm outer diameter video borescope with motorized 2-way articulation and 8000 lx LED illumination. Image processing, such as auto-gain and auto-exposure commonly found in today’s phone cameras, digitally enhances images, which enables inspectors to clearly see internal surface areas of interest.
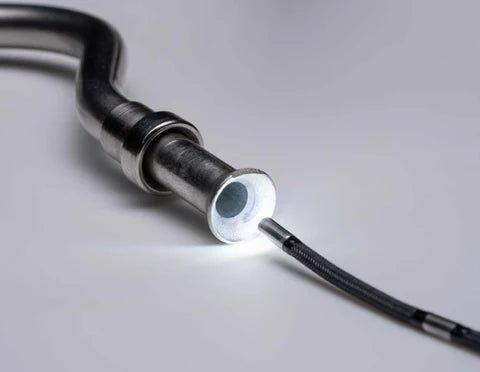

Top image: Yateks P+ Series 2.2 mm OD video borescope entering a 4.4 mm ID stainless steel fuel manifold tube.
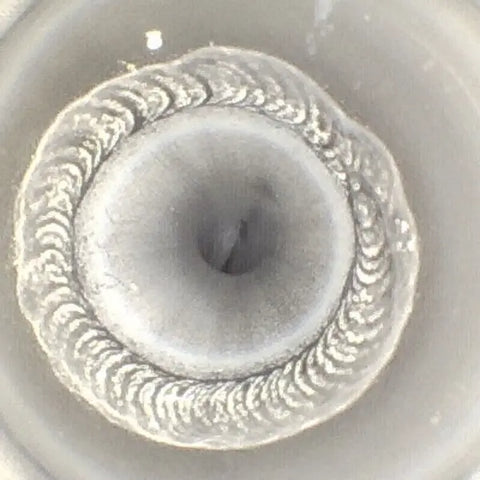
1st image: A 400 x 400-pixel vs. 2nd image: 720 x 720-pixel image of an orbital weld inside same fuel manifold tube.
Inspection technicians can conduct thorough inspections of critical aircraft components without the need for extensive disassembly, significantly reducing downtime and maintenance costs. The high-resolution images and videos captured can be used for real-time assessment and archived for historical records, aiding in predictive maintenance and the long-term management of aircraft longevity and safety.
Live Weld-Monitoring Cameras: Enhancing Precision in Tubing Manufacturing
The tubing manufacturing sector, particularly for high-pressure tubing used in the oil and gas industry, demands exceptional weld quality to prevent component or system failures. Post weld inspection is a prime candidate for NDT sub-surface inspection (ultrasonic and eddy current), but live weld monitoring is becoming a widely adopted quality control measure made possible with camera technology advancement.
Live weld-monitoring cameras facilitate a real-time view of the welding process that is critical for ensuring adherence to quality standards. These tools allow automated weld line operators to make necessary adjustments swiftly and accurately during the welding operation, thereby contributing to the overall integrity and quality of the weld.
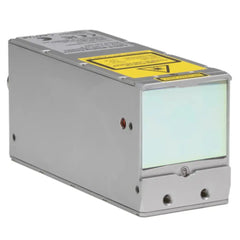
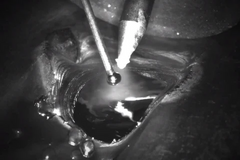
Top image: The Cavitar C400-H Welding Camera and Bottom image: live gas tungsten arc weld (GTAW) produced by camera
These advanced camera sensors utilize a combination of ultra-dynamic range imaging, laser illumination, and neutral density (ND) bandpass filtering to generate consistent video representations in the presence of the intense light and heat characteristic of the weld arc. The clarity and homogeneity of imagery afforded by this advanced sensor technology allows operators to observe detailed aspects of the welding process, such as electrode placement, weld pool dynamics, bead formation, and the melding of filler material with base metals.
The ability to closely monitor these factors in real-time provides operators with insights necessary to adjust welding parameters effectively. A quick adjustment or intentional shutdown on a misaligned tube seam can positively impact welding structural integrity, consistency across production runs, or reduction of scrap.
The integration of live weld-monitoring technology in tubing manufacturing not only optimizes the welding process but also significantly reduces the incidence of defects that could compromise the tubing's performance in critical applications. As a result, manufacturers can ensure higher quality products, maintain compliance with industry standards, and minimize the risk of product failures or recalls.
Pan-Tilt-Zoom (PTZ) Cameras: Preventative Maintenance in Power Generation
In fossil fuel and nuclear energy facilities, preserving the structural integrity of infrastructure presents a formidable challenge. Pan-Tilt-Zoom (PTZ) cameras are essential instruments within these sectors, enabling RVI of expansive regions and intricate structures, including boilers and turbines, with precise detail from considerable distances. The latest OEM block camera technology used in PTZ camera systems achieves the clearest imaging to date with powerful optical lens zooming, more accurate color and light representation, and responsive mechanical control.
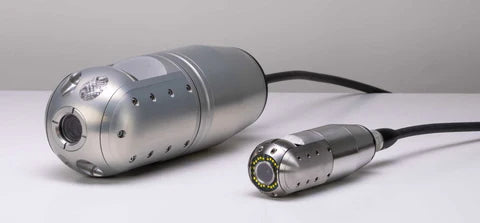
Image: VISIOPROBE PTZ Camera 90 mm OD anodized aluminum (left) and VISIOPROBE PT Camera 45 mm OD stainless steel (right)
Equipped with the ability to mechanically pan, tilt, and zoom to a significant degree, PTZ camera systems cover extensive areas, providing high-quality images that can be crucial for identifying potential issues such as corrosion, wear, and structural defects in power facilities. The versatility of PTZ cameras makes them suitable for both routine in-service inspections (ISI) and emergency assessments, enabling operators to quickly and efficiently pinpoint problems and plan maintenance activities accordingly. RVI in this manner can be a critical precursory step to ultrasonic or eddy current NDT.
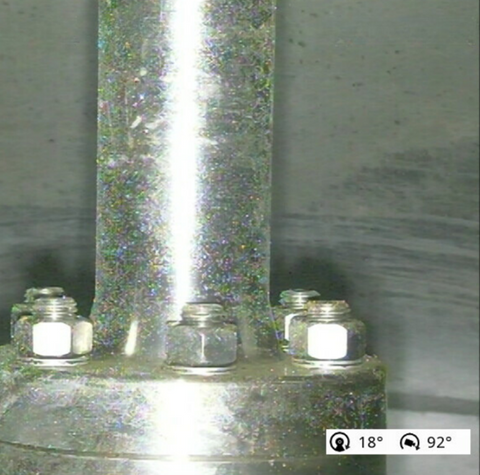
Image: VISIOPROBE PTZ camera imaging an internal joint inside a large vessel.
The application of PTZ cameras in power generation enhances safety by reducing the need for personnel to access dangerous or hard-to-reach areas. Additionally, the ability to conduct inspections without shutting down operations minimizes downtime, ensuring continued power supply and operational efficiency. With advancements in camera technology, including higher-quality color CMOS sensors and other thermal imaging capabilities, PTZ cameras are becoming even more powerful in detecting surface abnormalities that might need further NDT and examination.
The Impact of RVI Technology Advancements and the Road Ahead
Recent progress in RVI technologies, including video borescopes, live weld-monitoring cameras, and Pan-Tilt-Zoom (PTZ) cameras, has provided tangible improvements in critical inspection processes within aerospace, tubing manufacturing, and power generation industries. These technologies facilitate more detailed, time-efficient, and safer examination methods, aligning with the growing need for heightened quality, dependability, and performance in these fields.
Such innovations in RVI are transforming the approaches to inspections and quality assurance, paving the way for advanced predictive maintenance strategies and contributing to the prolonged service life of essential equipment. As these technologies advance, it is anticipated that their applications will broaden, becoming increasingly integral to industrial procedures across various sectors.
With continuous advancements in technology, it becomes imperative for industries to invest in complementary RVI strategies under NDT disciplines to fully leverage their capabilities. Such investment is crucial for maintaining the highest standards of safety and quality in surface and sub-surface inspections, thereby preserving a competitive stance in the dynamic global market. The ongoing development of RVI technologies illustrates a dedication to excellence in NDT and quality assurance, keeping pace with rapidly evolving industrial innovation.

